Rubber City Motoring

Vehicles, Products and Events

  • Start
  • Vehicles
  • Products
  • Events
  • Movies
  • Corvette FRC
  • Impala Project
  • Parts Bin
  • About
  • Contact

Husky WeatherBeater Floor Liners

June 17, 2014 by JT

If you are somebody who likes your car interior neat and tidy, carpet protection is one of the easiest things to do nowadays.  There are a number of companies that have various options to keep your carpets looking like brand new.  In the past, these options were really only available for trucks and SUVs.  Now it seems like you can get quick and easy floor protection for just about any vehicle.

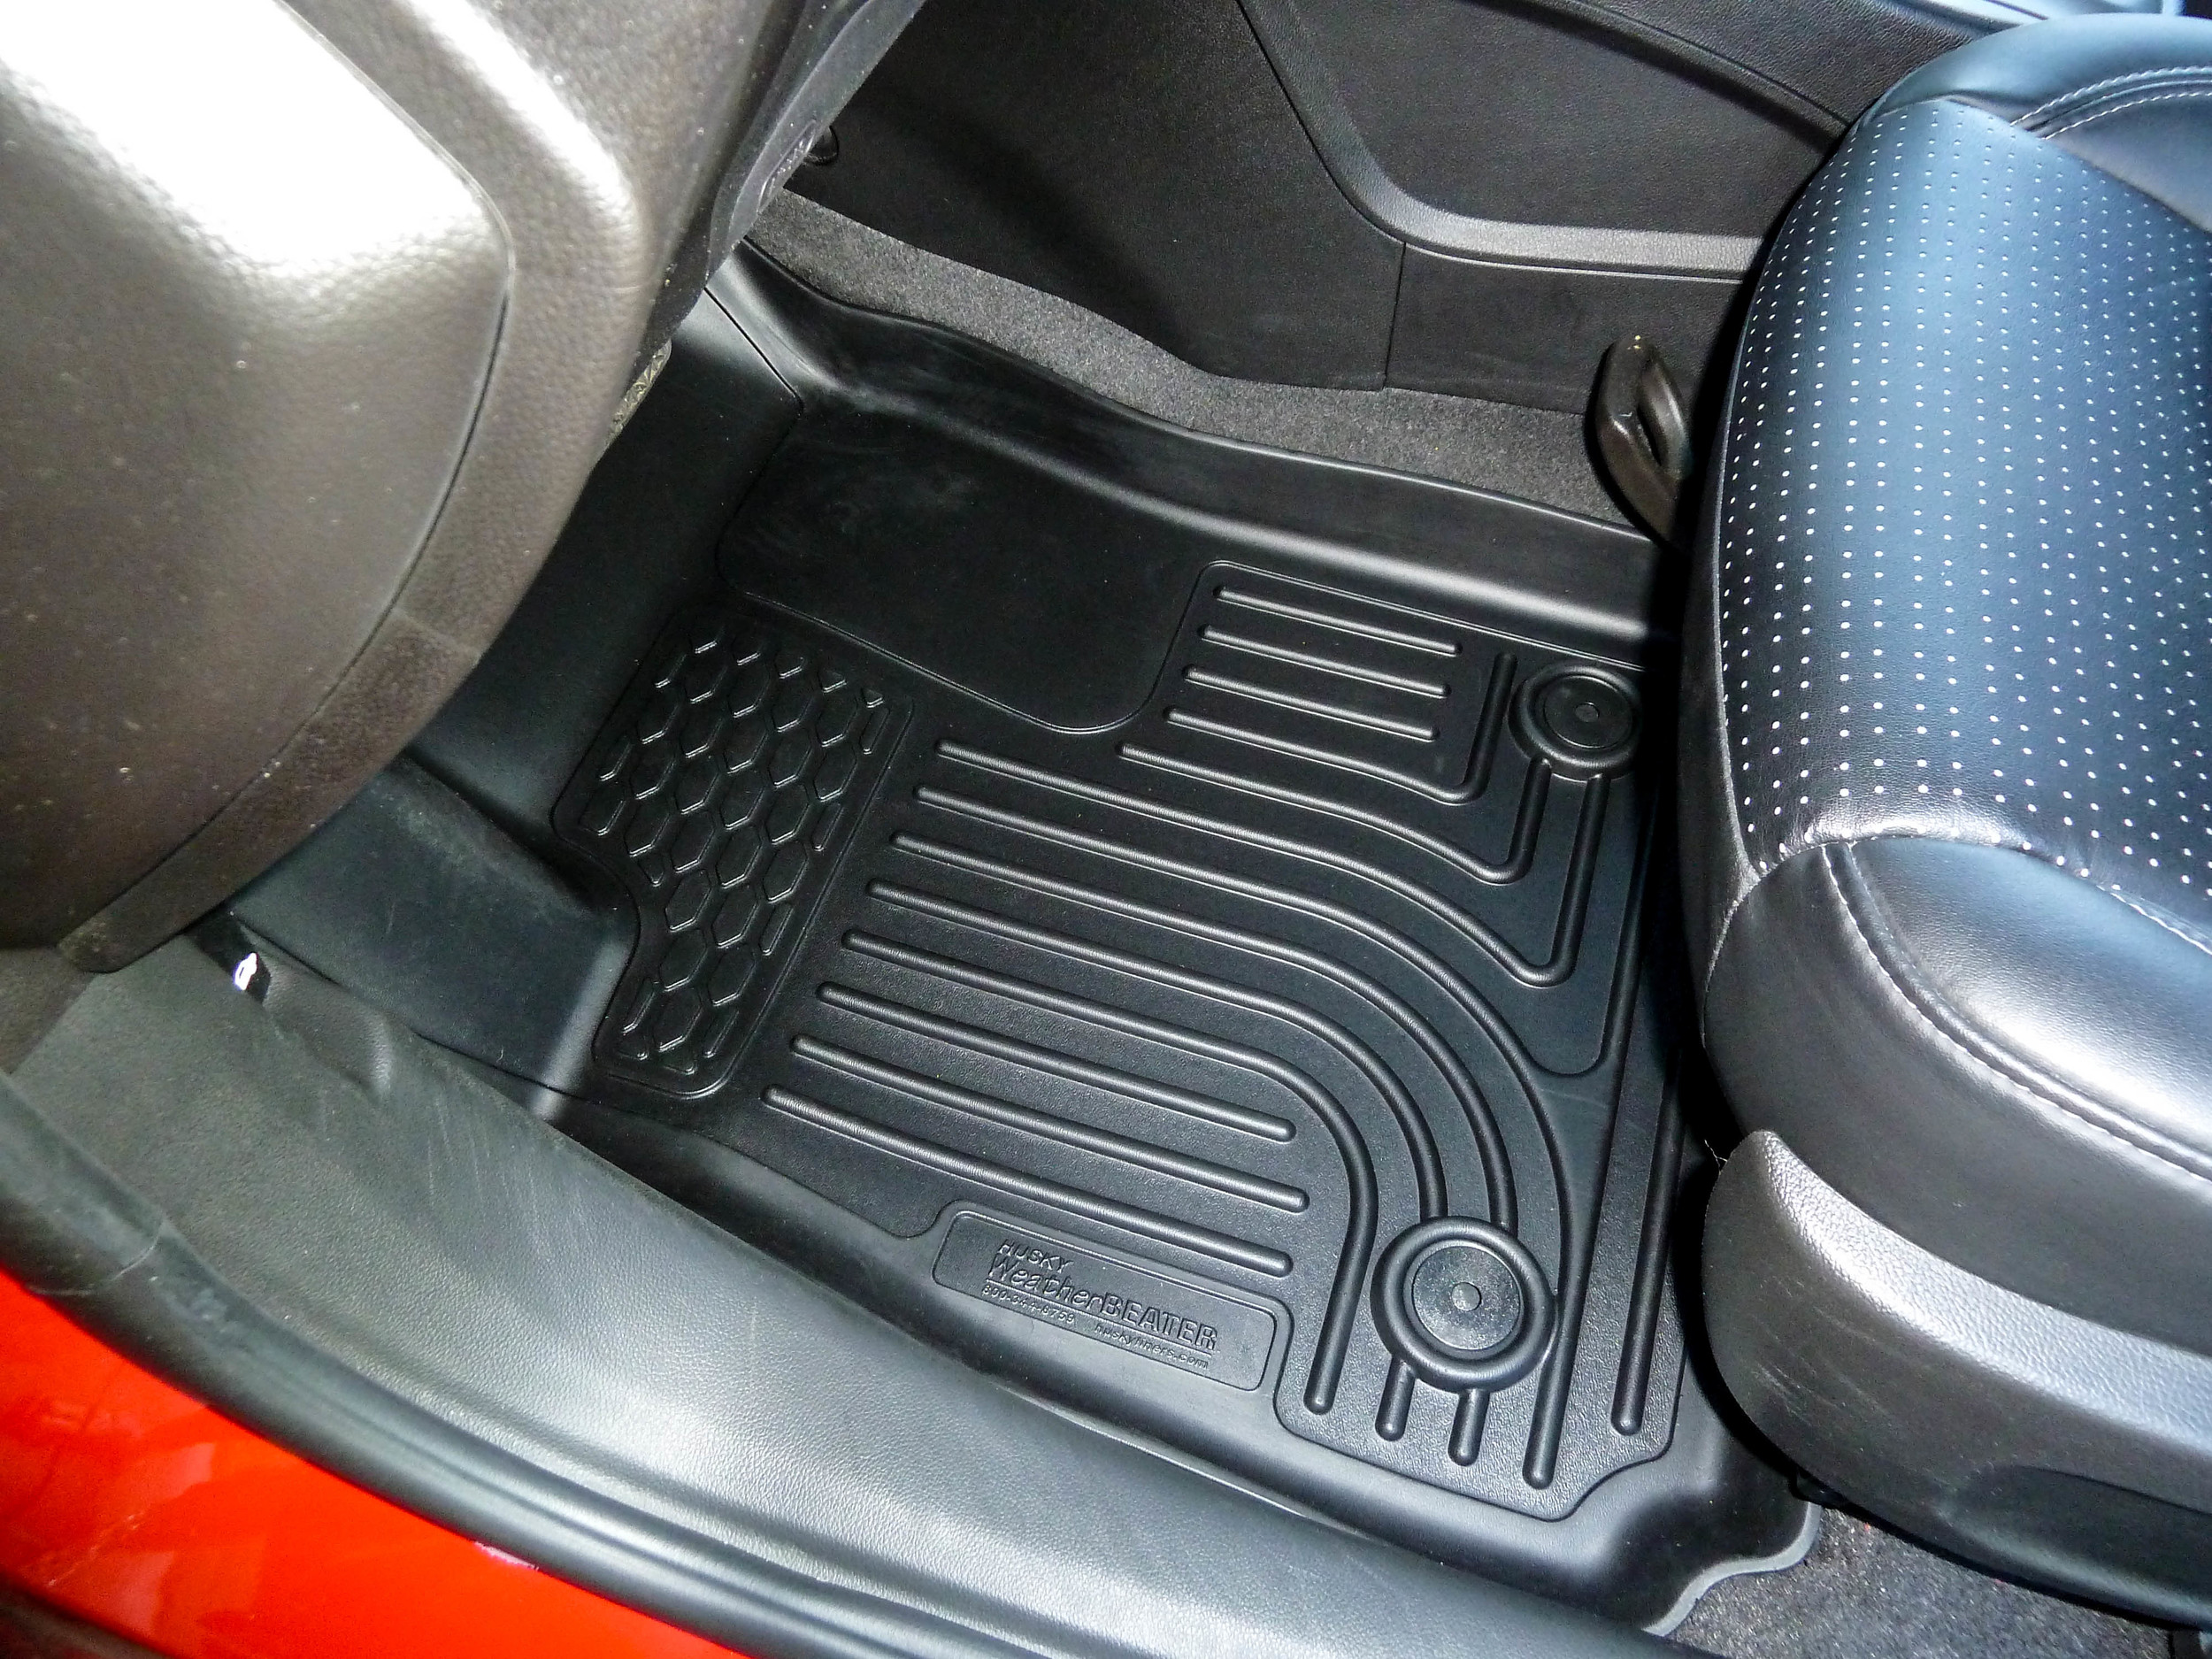
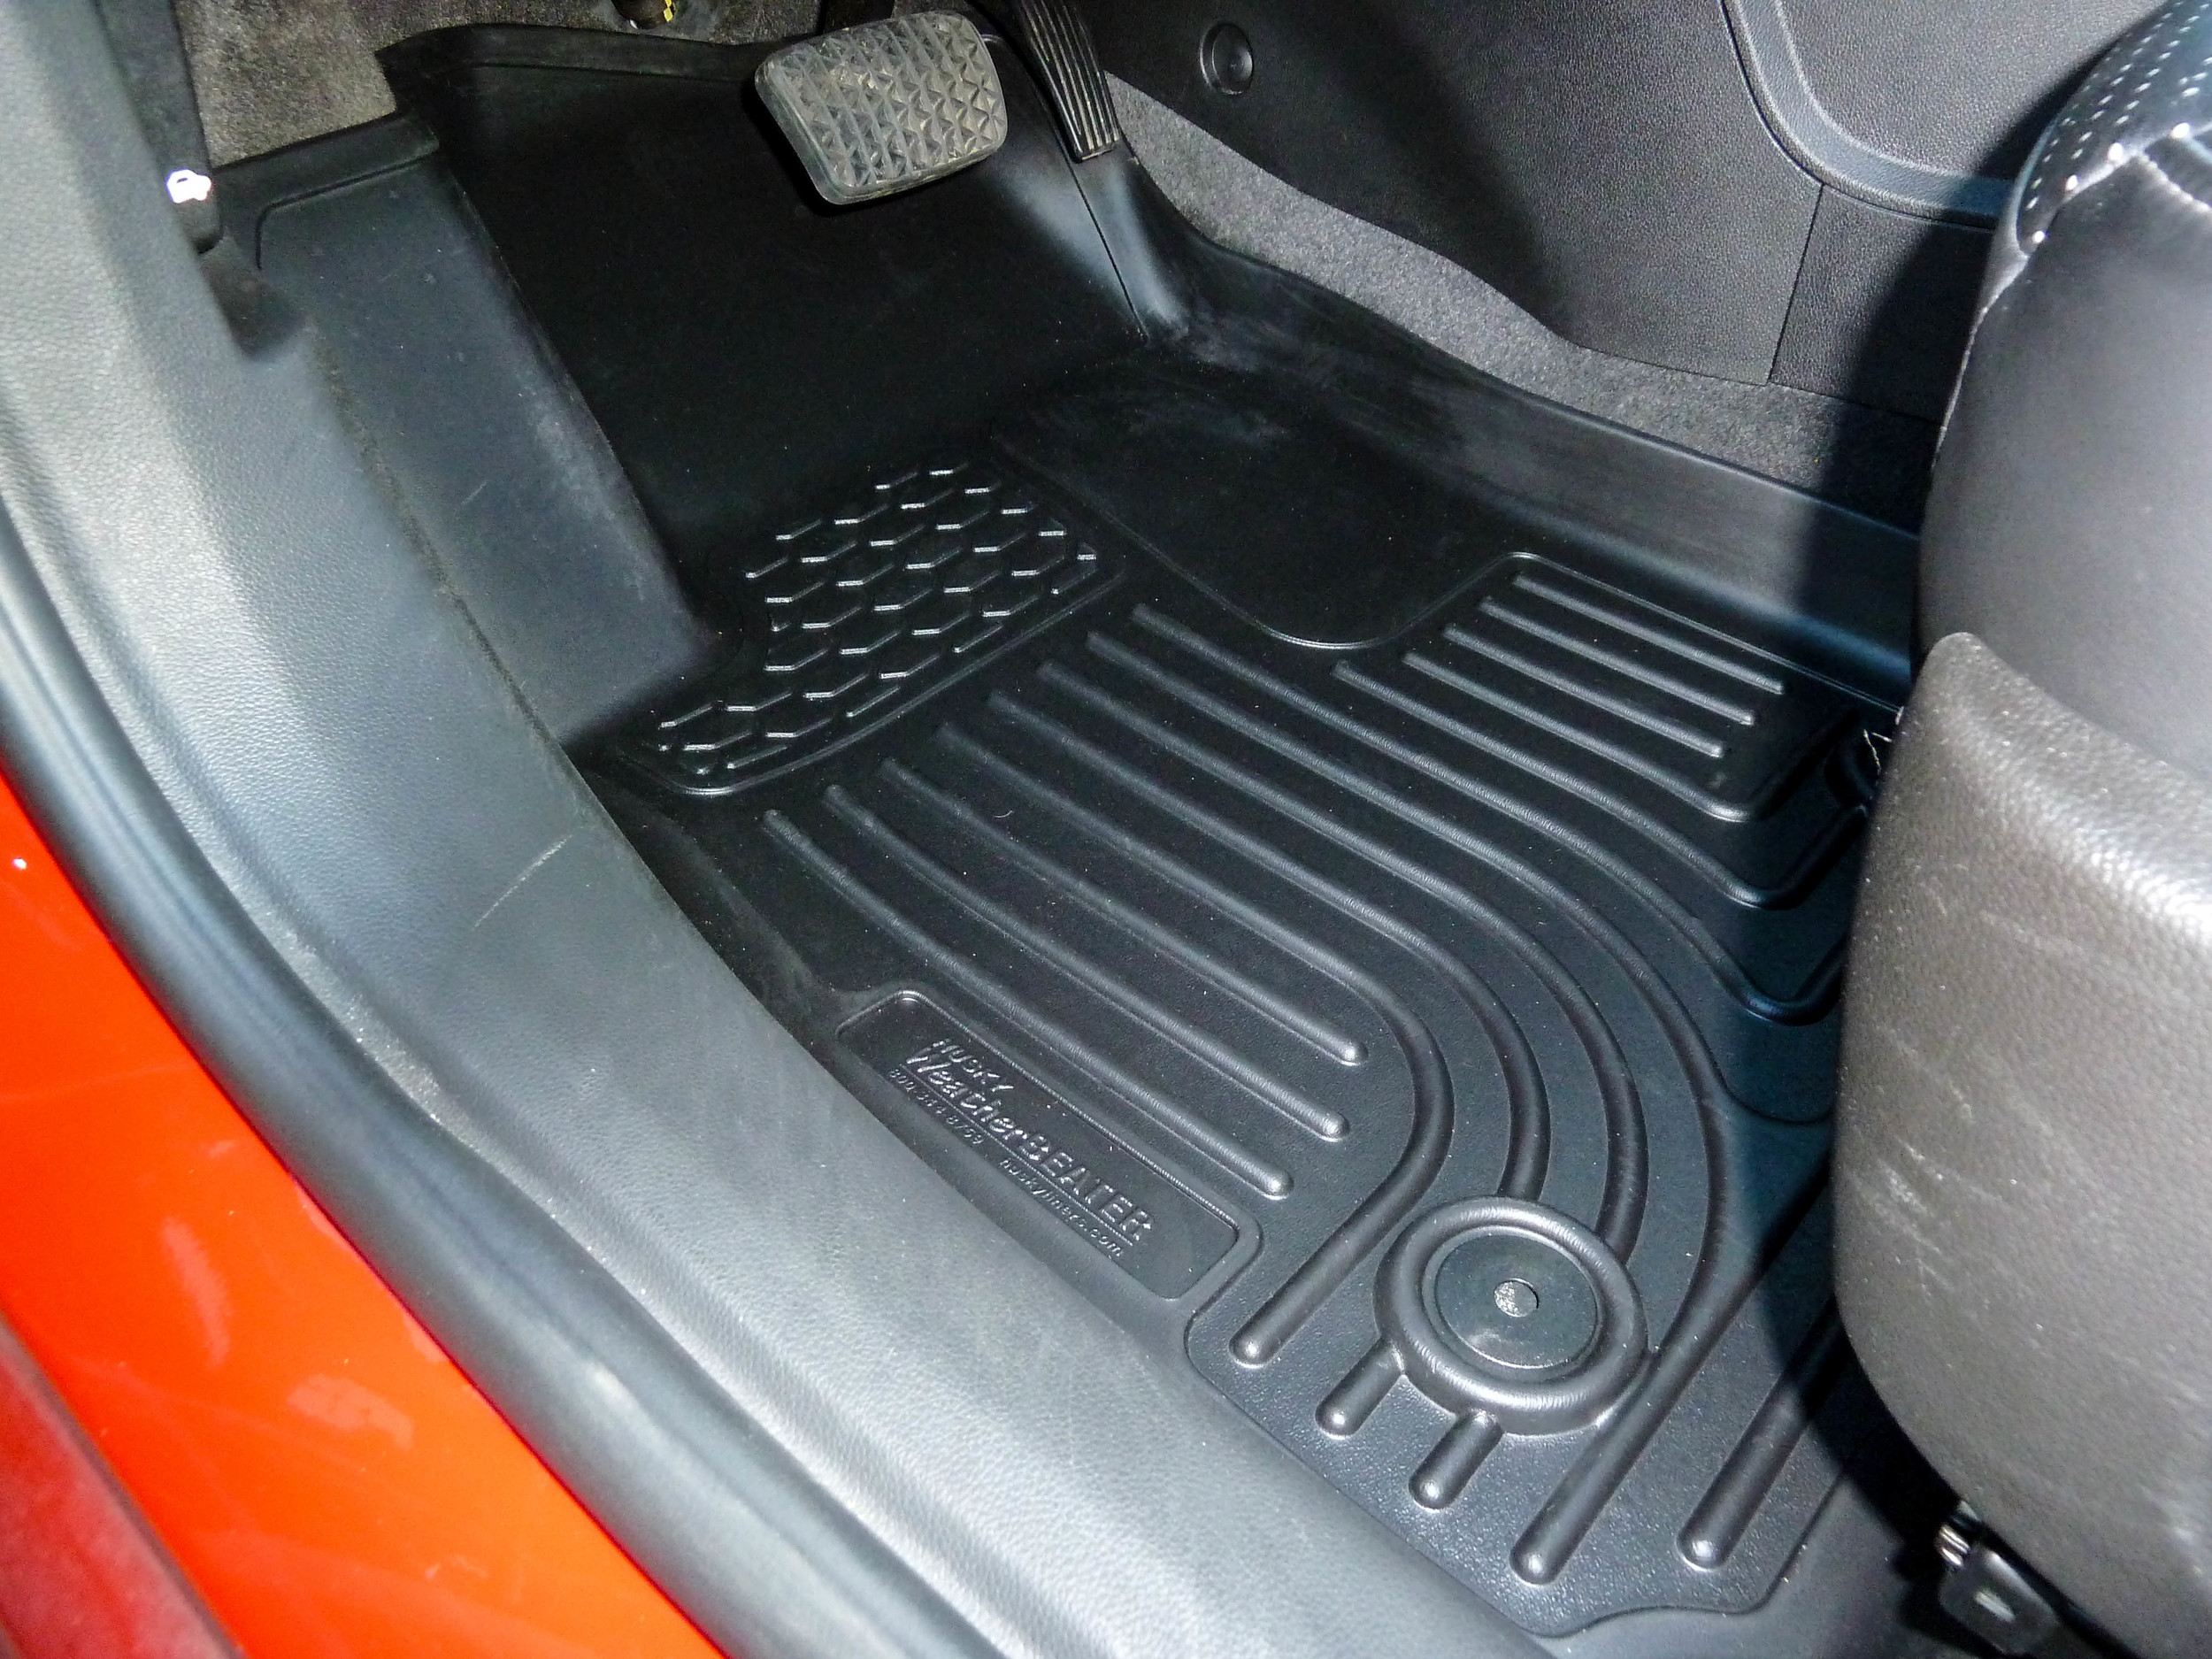
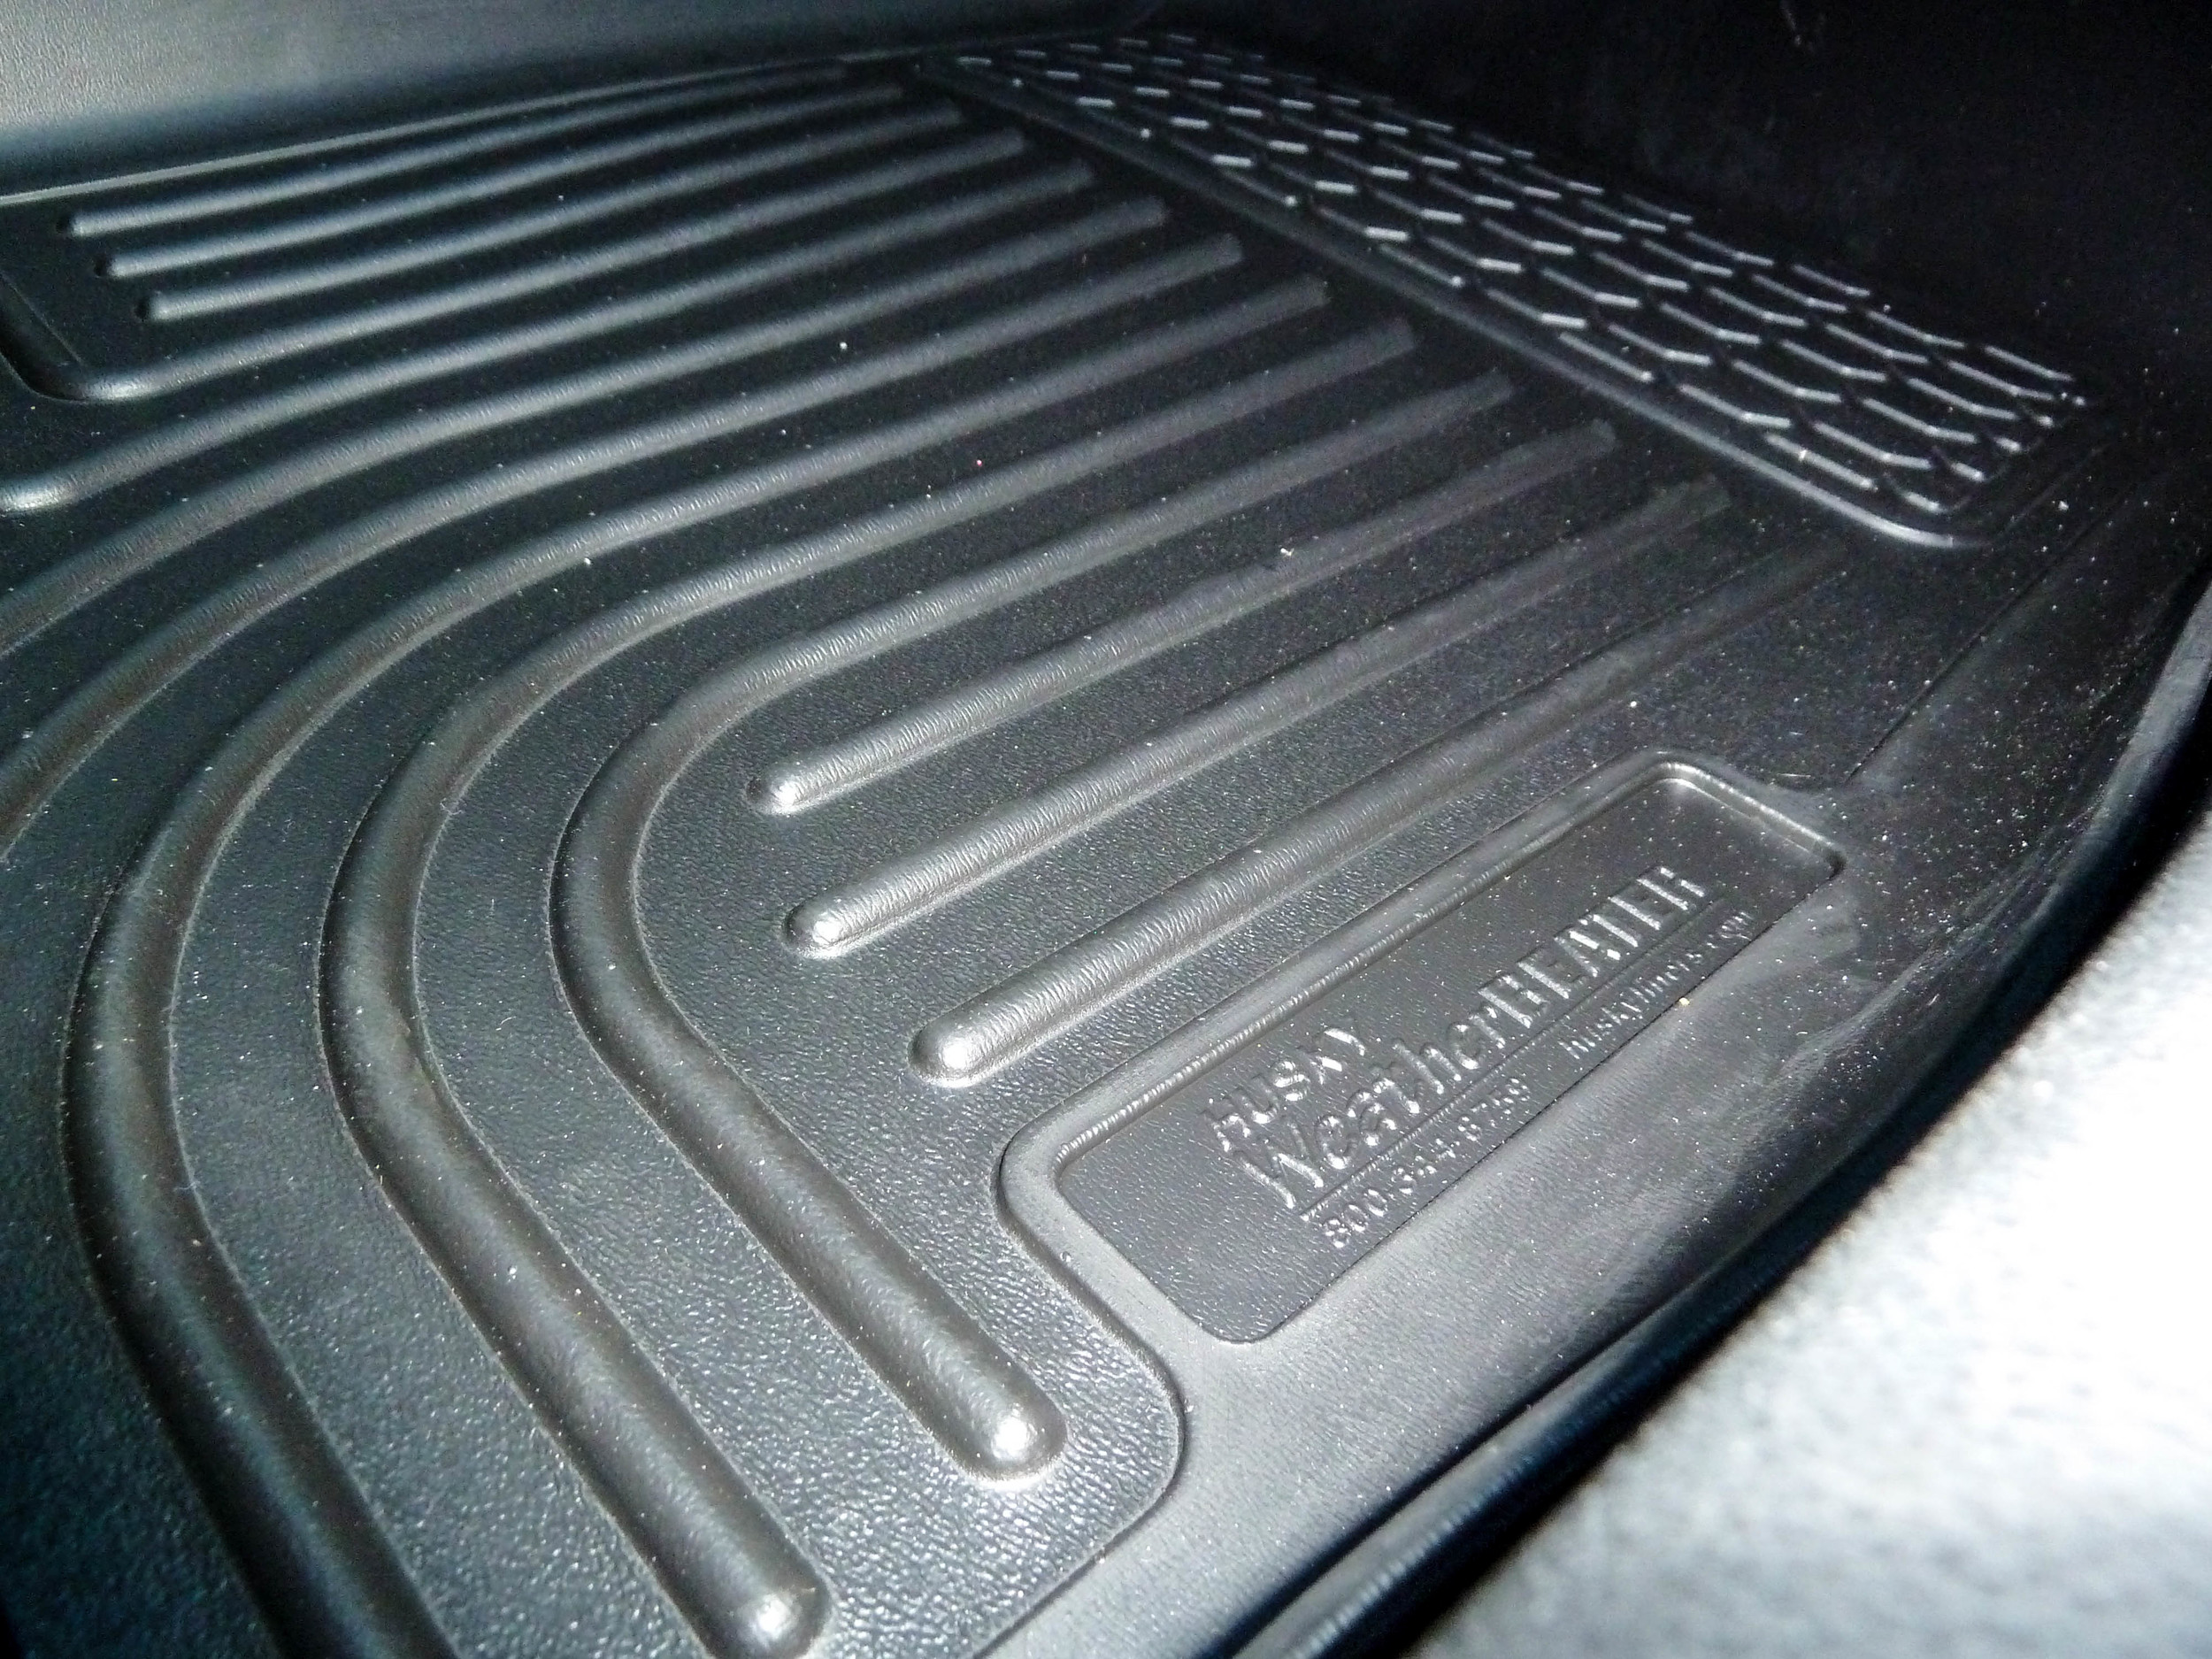
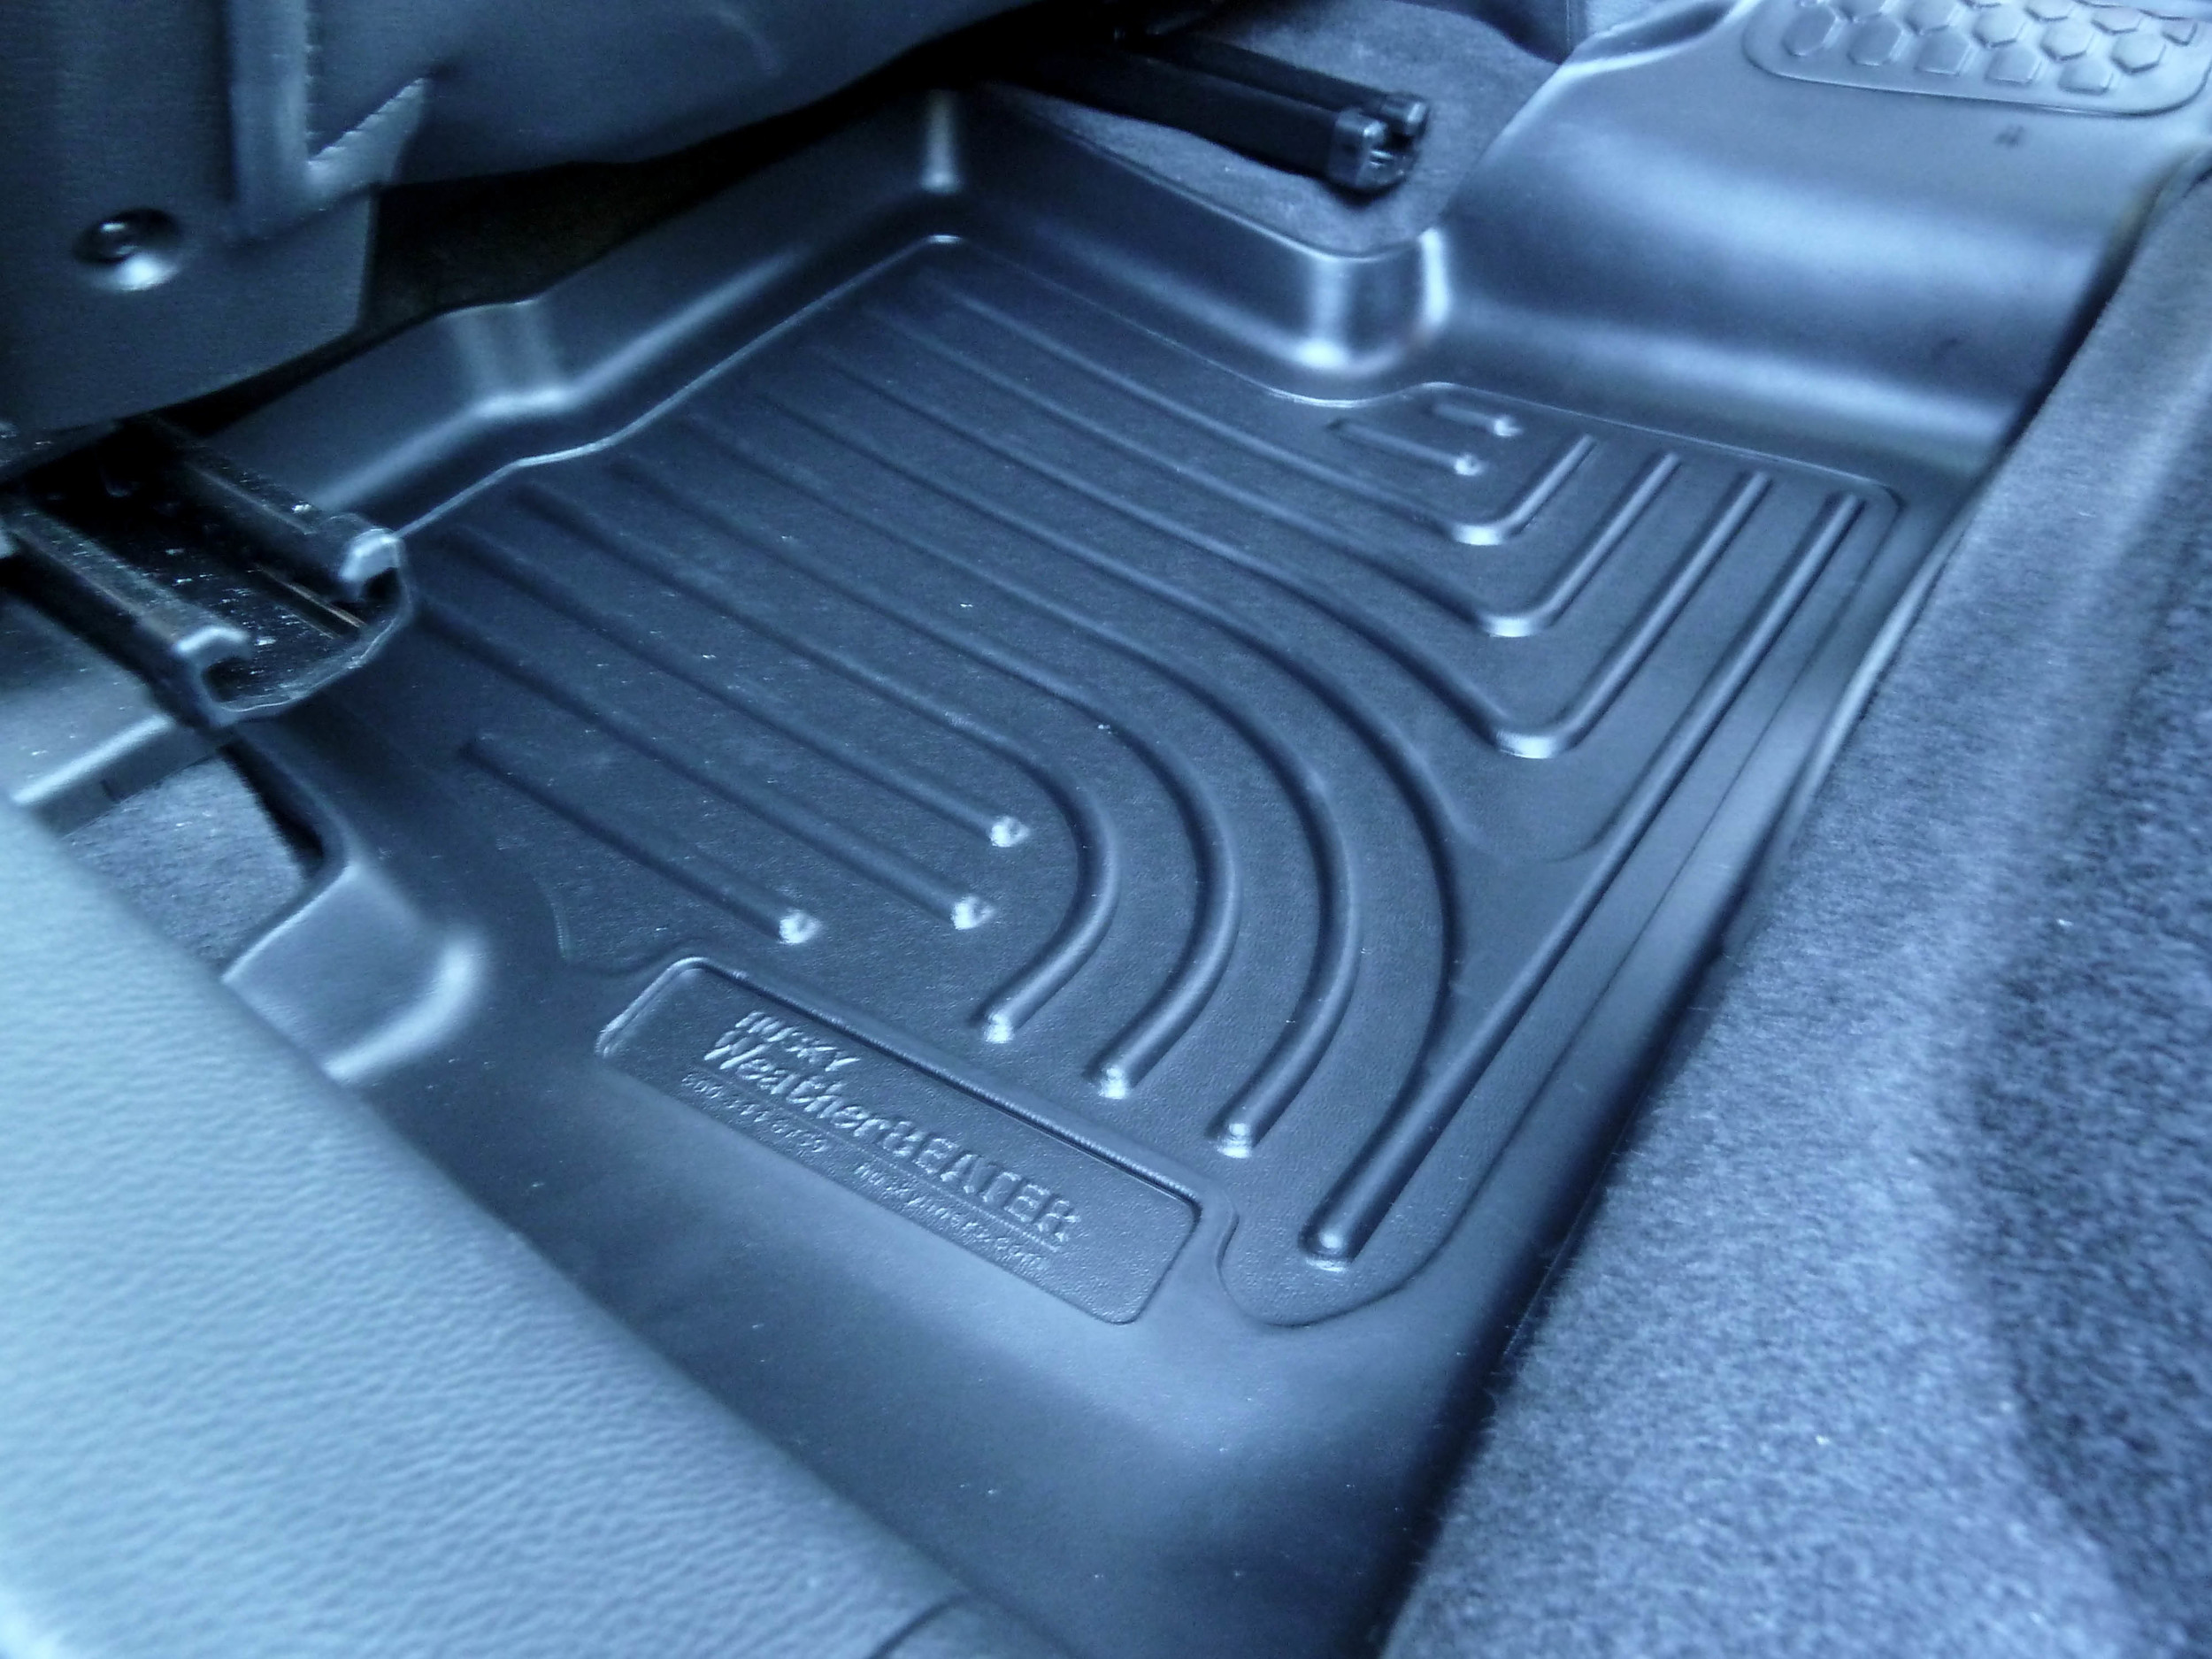
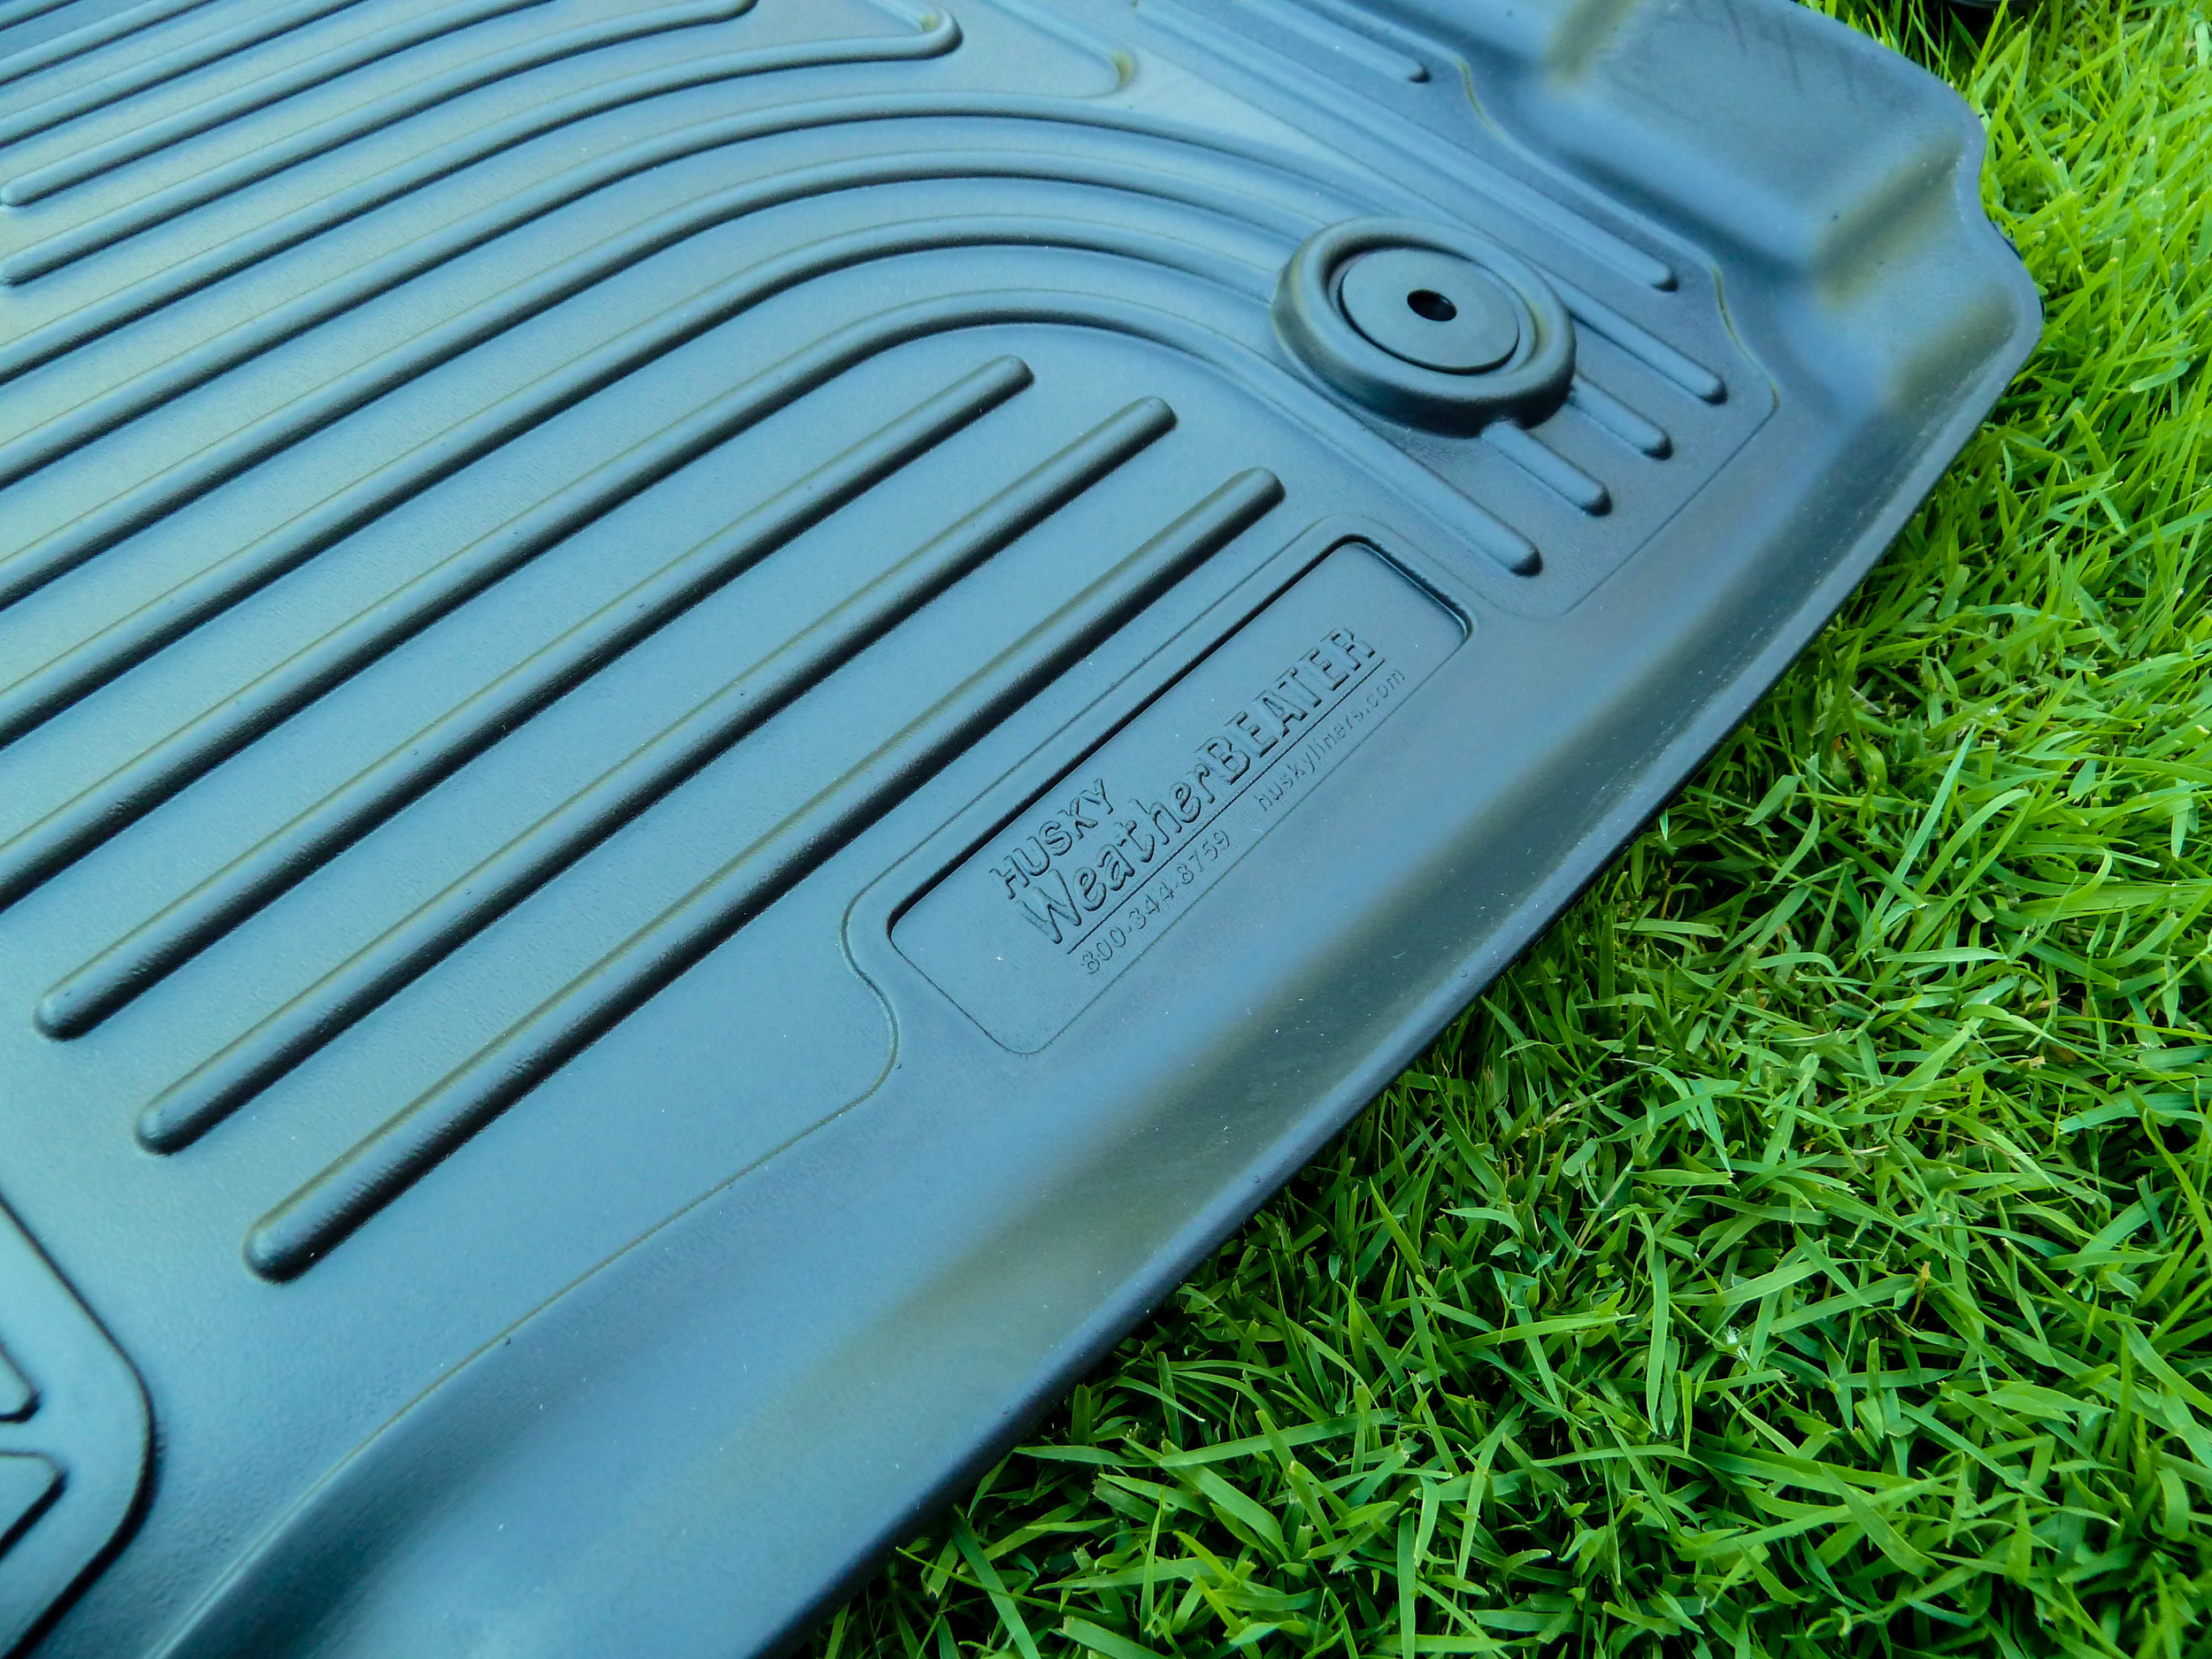
Husky Liners sent us their WeatherBeater Floor Liners to try out on one of our long term test vehicles.  When they say floor liner, these basically are perfectly molded to a specific vehicles floor.  These will not fit any other make or model.  They have raised edges that contain spills and also offer more protection.  When you have these installed, they will catch and trap just about anything that falls on them.  Once you are ready to clean your car up, simply remove these and hose them off.  The $1.75 spray and wash really gets them looking like brand new with a little soap then rinse water.

Hoagies Garage is based out of Akron, Ohio.  We get all four seasons here and this type of floor mat is almost a necessity in the colder months.  Wet shoes, snow covered boots, road salt, cinders, and just about any other winter element is captured and contained by the Husky Liners.  For this particular vehicle, they are only offered in black, so dirt and debris will show easily, but I'd rather have it sitting on the plastic liners than being ground into the vehicle carpets.

Driver Side
Driver Side
Driver Side
Driver Side
Passenger Side
Passenger Side
Passenger Side Close
Back Seat
Back Seat
Back Seat Close
Back Seat Close
Husky WeatherBeater
Husky WeatherBeater

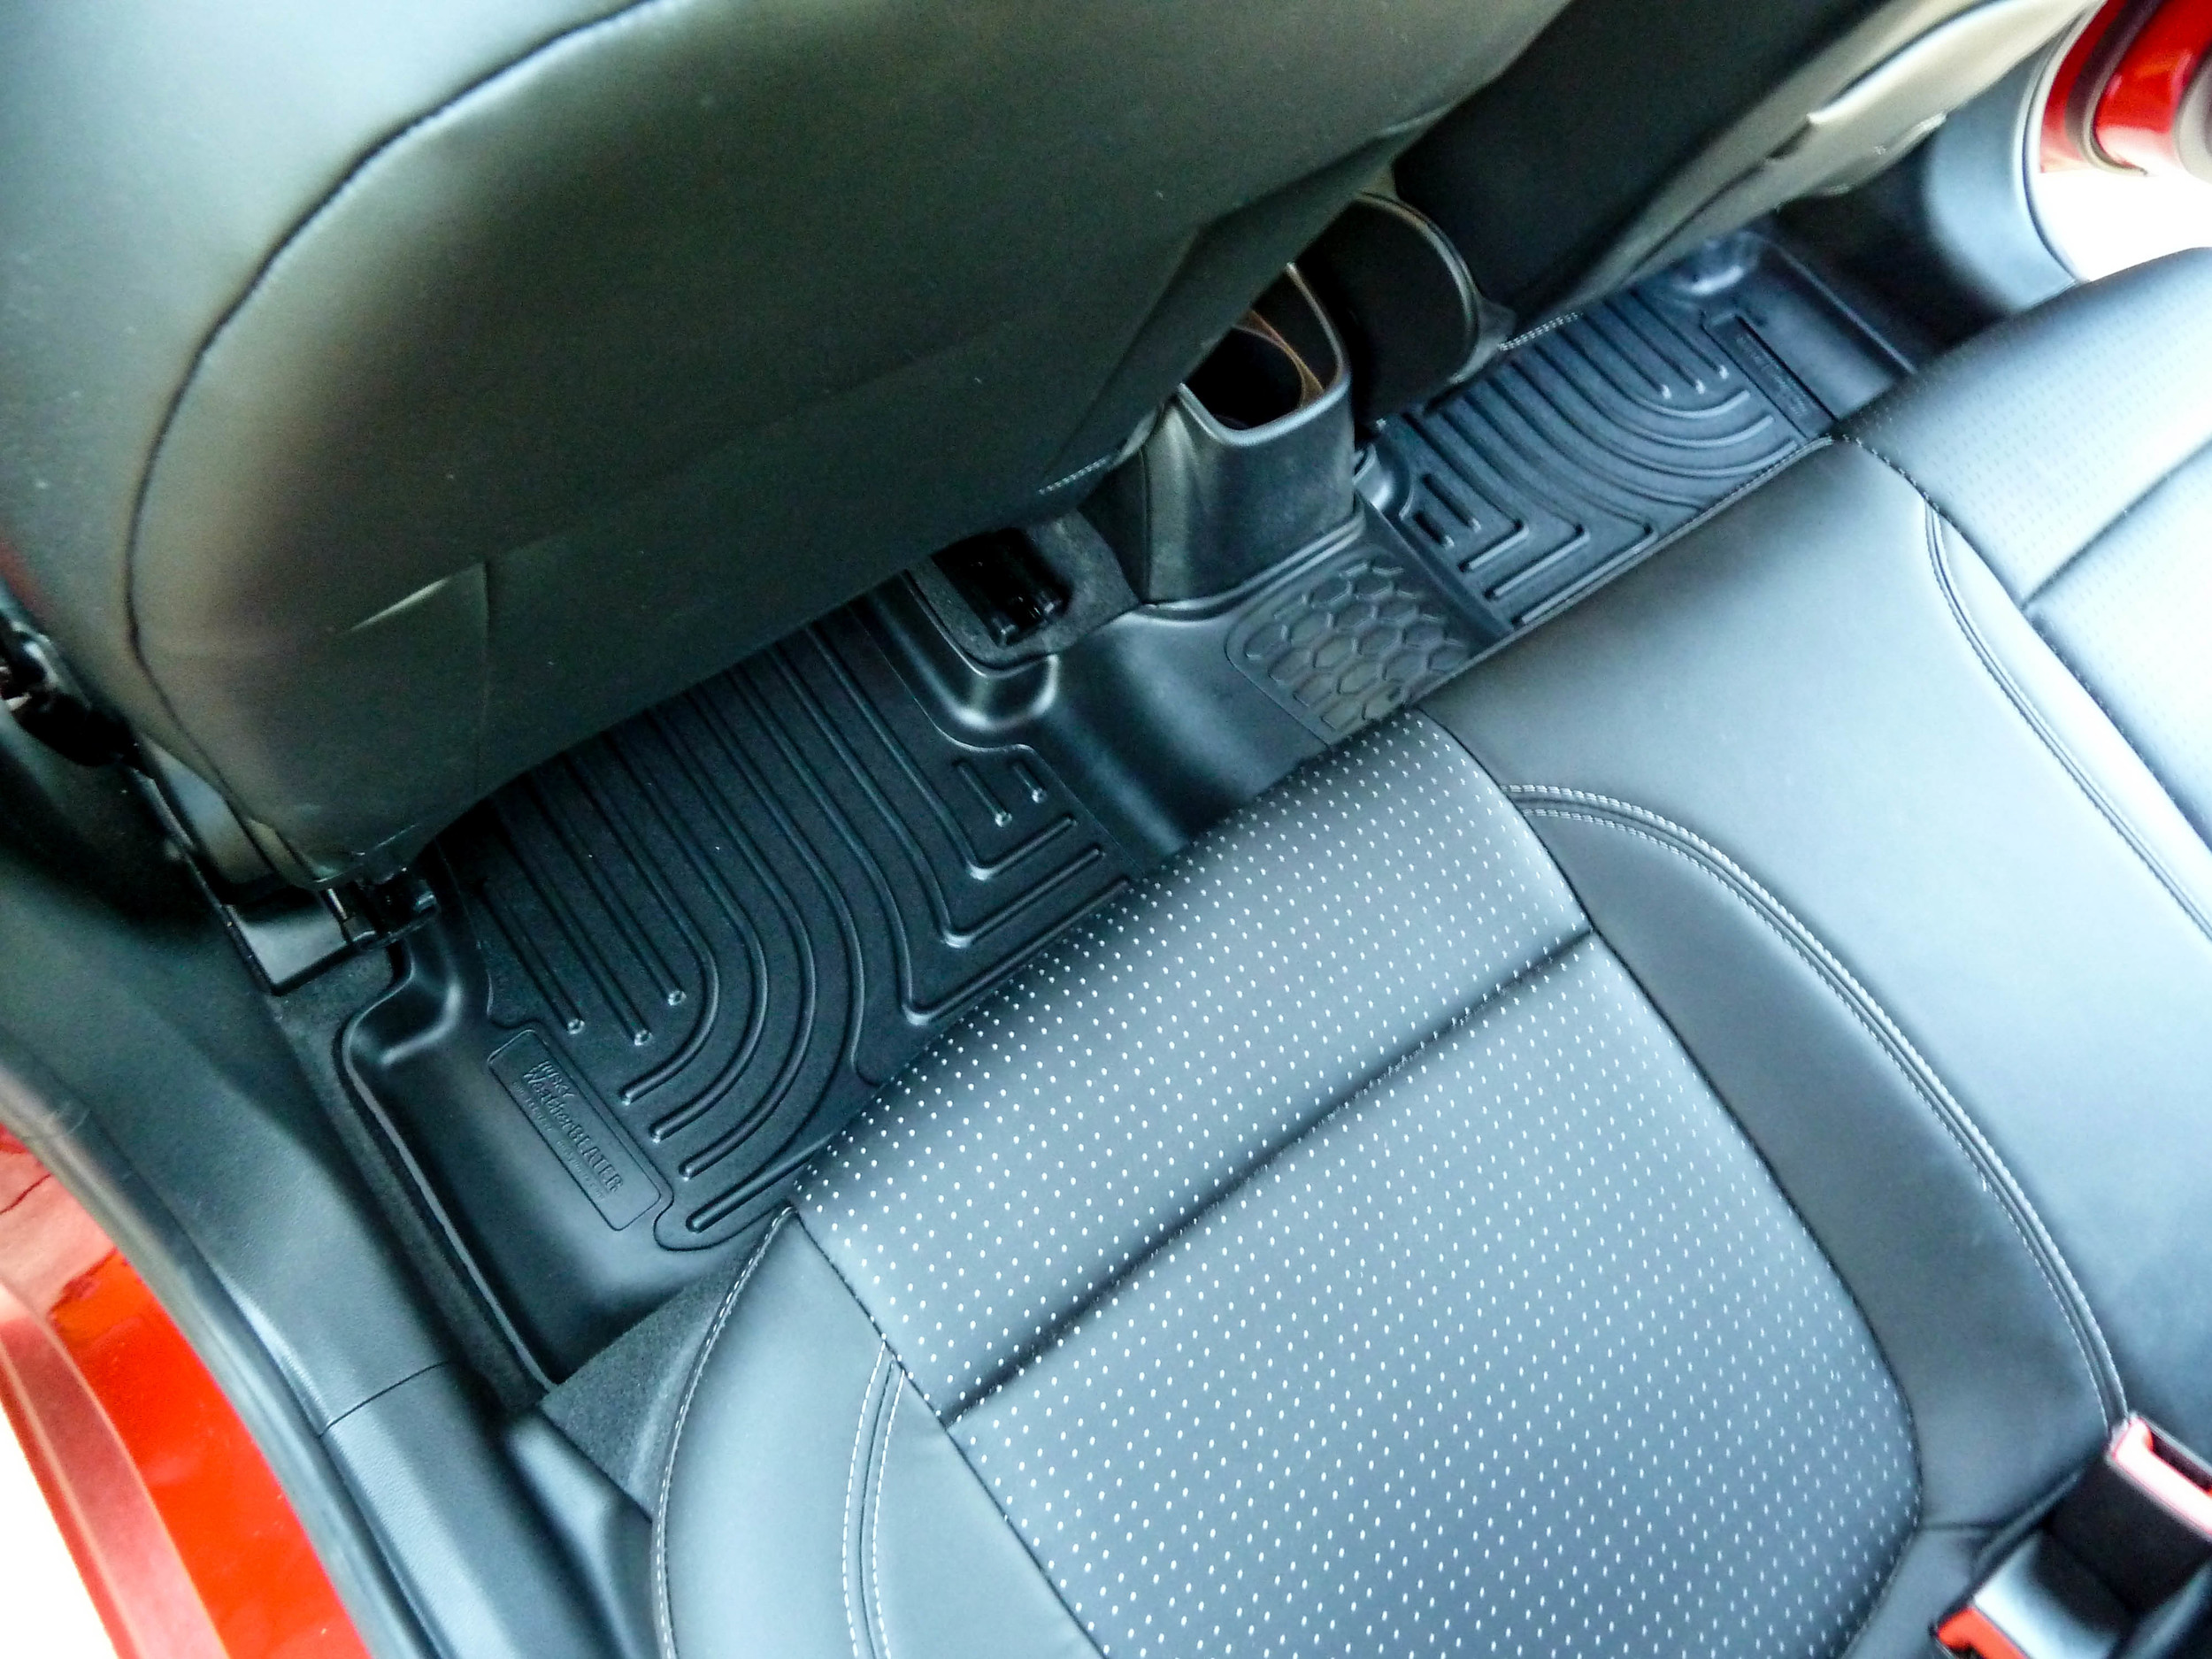
One recommendation I would have if you decide to go with these Husky Floor Liners,  simply remove them and clean every so often.  You'd be surprised how much they catch and how quickly the exposed carpet can become dirty.  Basically, you will see a definite line of clean/dirty on the factory carpets when you pull these out.  So just run your shop vac all over so that doesn't become permanent.  Husky makes a great product, so for your floor liner needs, Hoagies Garage recommends you give them your first look.  

For more information on Husky Liners and any of their other great products that are Made in the USA, please visit http://www.huskyliners.com

Buy on Amazon
June 17, 2014 /JT
Comment

-ZZPerformance Billet Engine Mount- Cobalt SS

June 13, 2014 by JT

In the garage today, we have one of the great GM products of the late 2000s.  The Cobalt SS is an amazing little rocket that we will do a full road test on very soon.  Today though, we are installing ZZP's Billet Engine Mount.  This little gem of a part will work with any Chevrolet Cobalt or Saturn Ion running the 2.0L or 2.4L engine, and only a manual transmission.  We are working on a 2009 SS sedan, with the turbocharged engine.  Some of the stated features from ZZP include an all aluminum construction that sheds a pound and also a poly center that eliminates engine movement.  For this review, we are going to go through the install and our impressions on what we have found. 

Install

From the get go, this was an interesting installation because ZZP included no instructions.  So basically we relied on our instincts and also a little googling.  To start, we removed the stock air box lid by undoing the clips.  The connector can stay on, as it will give you enough slack just to lay the top air box on your engine.  Next up are the top nuts and the tiny torx bit down towards the front of the vehicle.  Once you do this, the stock engine mount is revealed.

View fullsize P1040356.jpg
View fullsize P1040329.jpg
View fullsize P1040328.jpg

The engine has to be slightly supported for this mod, so a low profile jack with a small block of wood is placed under the oil pan.  Give your jack one or two pumps, just to slightly hold the engine up. 

From there, we broke all of the engine mount bolts loose.  The outer two nuts are 18mm and the three bolts across the top are 15mm.  None of them were gorilla tight, but a 1/2" drive and extension helped make this easier.  The top three are in an awkward position as well, so a wrench could be necessary as to not hit your engine with your socket setup.  At this point the engine mount wiggles right out.  Almost too easily...

P1040335.jpg
P1040334.jpg

This is the fun part.  Admire your new part next to the old stocker and see where your cash has gone.  The ZZP mount is much simpler, sturdier, and looks better too.  You can see the differences for yourself.

View fullsize P1040343.jpg
View fullsize P1040336.jpg
View fullsize P1040339.jpg
View fullsize P1040341.jpg
View fullsize P1040337.jpg

Installation of your new mount is basically the same as disassembly, but in reverse order.  Go ahead and fit your new mount to the studs on the frame.  We opted to start the long bolts into the engine first, as those seemed to have the least amount of play involved.  Once those three were started, we caught the 18mm nuts. 

P1040347.jpg
P1040355.jpg
P1040352.jpg
P1040351.jpg
P1040349.jpg

The frame nuts need to be torqued down first.  Move onto the engine bolts, tightening the middle one first.  This will pull the engine up to the ZZP Mount nice and straight.  We didn't fully wrench this down yet, just snug.  Then move to the back one, snug it, then make the front one snug. We did final tightening on them all, alternating and slowly torquing them as to pull it all up evenly.  There is a torque setting I'm sure for these, but I just basically used the same amount the factory bolts had, maybe a tick more, nothing crazy though.  After that, lower your jack, reinstall the air box and you should be good to do. 

Impressions

The mount does transmit a little bit of vibration into the cabin.  To us, it almost sounded exhaust like, as you were feeling and hearing the vibrations.  Overall though, it is definitely liveable for a daily driver and nothing too crazy.  You will notice a difference for sure though.  We didn't get into any hard launches or attempt to beat on the car, but you do get the sense that the engine feels tighter at higher revs and through the power band.  To get an idea of what we mean, you would really have to drive one of these before and after installation for comparison purposes.  Some people worry that this type of mod might ruin this car.  This is not one of those modifications, as you will enjoy your car a little more and sacrifice just a tiny bit of comfort in the process. 

Next on the list from ZZP is a set of rotated front/rear transmission mounts.  We will do the same thing, documenting the procedure for installation and also our impressions. 

FYI- The top three engine mount bolts are very close to the engine.  With that being said, if your vehicle was involved in a passenger side impact or something along those lines, it could feasibly throw off your mount alignment and make those bolts difficult to install.  Just something we noticed during our installation. 

For more information on this and many other great products, check out ZZPerformance - http://www.zzperformance.com

June 13, 2014 /JT
Comment

SR 10" Combo LED Light Bar

May 16, 2014 by Jay

Shoulder season in Utah means only one thing, desert trips. Everyone is done skiing and while the mountain bike trails down low are dry the snow melt up high is keeping the best of the trails off limits. The stream of RVs, side by sides and Subarus head south. With a forecast of temps in the 80s and not a chance of precip, the crowds would be in full force. I had no fear though, Rigid Industries supplied their 10” SR Series Combo LED Light Bar to illuminate the trail past all the crowds.

View fullsize P1040150.jpg
View fullsize P1040151.jpg
View fullsize P1040155.jpg
View fullsize P1040156.jpg
View fullsize P1040158.jpg
View fullsize P1040160.jpg
View fullsize P1040162.jpg

Lets start with the unboxing though. This thing is solid and very well engineered. Pulling it out of the box the first thing you notice are the cooling fins on the rear of the aluminum housing. It has a solid feel to it but it is minimalistic in design. The depth of the entire light is only 3 ¾” and along with the supplied mounting brackets (2 different lengths included), I knew I wouldn’t have any problems finding a spot to mount this thing. The supplied wiring harness plugs right into the wire from the light with a water tight coupling. So I set the harness and lighted switch aside while I looked for the obvious places to mount. On the 2004 Tacoma the first and obvious place to mount the light bar is behind the grille.  The light being 3 ¼” tall would fit perfectly between the horizontal bars of the grille. Once I popped the hood though I realized that would require a custom mount to bridge some supports. Lower down on the lower valance there was a slot with a few options. Behind the slot was some sheet metal molded into a radiator support. I measured the spacing of the mounts to see if they could align with the holes existing in the support. No such luck, it also looked like it might be a bit high also. My next option was the flange on the lower side of the same support but where the spot welds are located. Perfect fit. At this point I needed extra hardware for the installation. All that was needed were two more ¼”- 20 bolts and nylon lock nuts with washers. Drilling the holes required a longer drill bit to make it through the valance.

2014-04-13 09.53.35.jpg
2014-04-14 18.23.45.jpg
PiecesForInstall.jpg
MountLocation.jpg
CloseupLightInstalled.jpg

Now with the light mounted I stretched out the supplied harness and followed the simple diagram included with the kit. I lined everything up on the driver side of the Tacoma. I then hooked the wires to battery terminals and mounted the relay to the 10mm bolt holding one side of the fuse box on to the inner fender. Trying to get the 3 wire ends through the firewall grommet was tough and I ended up having to stretch it out and slice it a bit to push them through. I used an OEM fog light switch from Toyota so it would fit without any custom fabricating on my interior. The supplied lighted switch is more than adequate though. It lights up red when the light is on. I did have to switch the the wiring around from 10” and smaller lights to the larger lights in order for this to work, otherwise it was always lit red. Rigid made it easy for this wiring all that was left was to plug the harness into the light. Click and done. I zip tied and tucked the few feet of extra harness next to the battery. I hit the switch for the first and heard the click. I ran to the front of the truck and was about blinded. This thing is bright!

MountPosition.jpg
PlatePopout.jpg
switch.jpg
SwitchInstalled.jpg

I couldn’t wait for the next morning to leave for the desert so that evening I drove up to a road where I was pretty sure I wouldn’t blind any oncoming traffic. The combo light does a great job of covering the sides of the trail/road, but, those spot LEDs in the middle are amazing! It throws light for an easy 100 yards and I could see reflectors lighting up further than that. I saw no problems with the light being mounted down low or even behind the valance a few inches. Back to the house to pack for the real test in the desert tomorrow.

Stock Headlights - Low Beam
Stock Headlights - High Beam
Stock Low Beam With SR 10" LED On

Heading south on route 6 with the windows down felt good. We made our way west on I-70 and continued south through the high desert of the San Rafael Swell. Upon merging on to the Temple Mtn. Road and getting closer to Goblin Valley we passed what seemed like hundreds of RVs and campers. Passing the trailhead for our afternoon hike we realized just how crowded it may be. We ventured down Wild Horse Rd. and passed a few more adventurous campers. We had our eyes on a mesa a few miles further and above the wash (which was the road) to get a better view of the Swell and Henry Mountains.

We set up camp and unloaded firewood and gear with plenty of time to explore Ding and Dang slot canyons. We first  made sure we got the location of camp for our friends who were to arrive later in the evening.

View fullsize 2014-05-03 11.56.30.jpg
View fullsize 2014 winter spring m bday 077.jpg
View fullsize 2014 winter spring m bday 086.jpg
View fullsize photo 3(2).jpg
View fullsize Camp.jpg
View fullsize photo 5.jpg
View fullsize RoadUpOutOfWash.jpg

After the 4 hour hike through some water and small crags the beers went down too easy. We started dinner preparations and few of us drove to where we could get cell phone service. Sure enough we got the “we got a flat and the spare is rusted stuck” voicemail. They also said if were not there by dark come help and only gave a vague location of where on the road to the north they were. Shit. I was a bit excited. It was close to dark. Let’s go. We drove for about a half hour and every car passing car we wished to be them. Finally just before Temple Mtn. road they appeared going only about 15 mph.  They had used a can of fix-a-flat but it sure didn’t look like it was holding. We stopped and attempted to break the spare loose. This is the first real test of the light. I parked so that the light would illuminate our work spot. The light made it feel as if we were working in daylight. No need for headlamps. It throws off a cool white almost blue. Definitely on the cooler end of the Kelvin color temperature chart. I ran the light for about 45 mins with my truck not running and had no problems.

After the spare went on I lead the way back to camp with the LEDs literally blazing the way. I tried to be courteous when passing camp sites but the few I didn’t see until it was too late everyone around the fire would turn to look and immediately shield their eyes. My fix-a-flat friends are even convinced of buying an identical 10” bar for how cleanly it can be hidden away but still be so effective.

I’ve got nothing but good things to say about the 10” SR Combo Light Bar. It is a must for camping and exploring in your vehicle. With a quick and easy install and solid quality, Rigid Industries is leading the market. I see more Rigid Industries in my future.  

For more information and to also purchase your own Rigid SR 10" Combo LED Light Bar, please visit www.rigidindustries.com

Rigid Industries 91031 SR-Series White 10" Spot/Flood Combo LED Light Bar
Rigid Industries
Buy on Amazon
May 16, 2014 /Jay /Source
Comment
P1030169.jpg

The Interceptor

February 03, 2014 by JT

In our holiday gift guide, we picked the Aeroforce Interceptor as being a great gift idea.  Like we did with the Valentine One, we thought it would be a great idea to run the Interceptor gauge through a series of tests and see how good it actually is.  The president of Aeroforce, which is based in Ohio, was very kind and gave us a great opportunity to take the Interceptor for a test drive in a few different vehicles.

The Aeroforce Interceptor gauge is a standard 2 1/16" gauge that will fit most gauge pods and openings.  One would purchase this gauge for a number of reasons, mainly being you want more information about your vehicle.  The gauge comes in a neatly packaged box that includes a couple different cords, basic instructions, and obviously the gauge.  Our tester gauge arrived with a black face and the black/white display color.  Also included was an additional gauge face that was white.  Aeroforce offers these faces with your vehicles logo on them, like SVT, Abarth, or even TRD.  This will give your gauge an almost stock like appearance in your vehicle for a small additional cost.  The kit also included a little bracket and finger screws which help the install process.  Depending on your install location, vehicle setup, and anything else this will all vary.  They have included everything though for most standard installs, you just need to provide the spot where it installs and route the wires.  Gauge pods are very popular for this, mounted on the pillar, center dash, or even on the steering column.  Be careful placing them in HVAC vents though, as Aeroforce says excessive heat can cause some issues with your gauge.

View fullsize P1030169.jpg
View fullsize P1030170.jpg
View fullsize P1030171.jpg
View fullsize P1030172.jpg
View fullsize P1030173.jpg

For our test, we decided not to fully install the Interceptor.  The plan was to see how the gauge worked in a few different vehicles and then go from there.  Basically, we just plugged the gauge into the OBD port under the dash and then started the vehicle.  The cord included is about 5' long, which gave us plenty of room to snake it around for our test.  The instructions give a pretty standard startup time for the gauge, our vehicles took about five seconds before the lights and Aeroforce logos appeared.  A neat little trick with this gauge is you can remove one of the stock logos and put on your own, like the "SS" you see below.  This is one of the many settings which you can setup and customize.  We chose to just pick as many parameters as possible, then see what shows up and what is useful.  Keep in mind, this gauge has the white/black screen.  Our photos came out sort of blue, but the screen is actually a black with white font.  This can be inverted as well, where the font turns black and the background is a bright white.  Aeroforce offers the screen in a variety of colors as well, including red, blue, and green.  The others can compliment whatever your interior colors may be or if you get all trick with LEDs all over.

P1030350.jpg
P1030351.jpg
P1030358.jpg

When looking at all this gauge has to offer, I was overwhelmed.  The amount of parameters and readouts was insane.  You really can monitor almost everything just from plugging this into the OBD port.  What is interesting is most of the features are being read by your on board computer already.  The interceptor allows you to tap into that and actually see what is going on.  Things like oil temperature, transmission temperature, throttle volts, spark advance, MPG, and many others are available. You can get the full list from Aeroforce Technology, which has a very detailed website.  The temperature displays were what interested me, when you consider that the stock engine temperature gauges anymore are really just dummy gauges.  They show hot, cold, and overheating - that's about all.  The interceptor allowed me to see exactly what the temperature was for the engine, engine oil, transmission, and also has an input in case I want to put a sensor into anything else on the car. 

P1030345.jpg
P1030352.jpg
P1030354.jpg
P1030355.jpg
P1030357.jpg
P1030360.jpg
P1030345.jpg P1030352.jpg P1030354.jpg P1030355.jpg P1030357.jpg P1030360.jpg

Taking all of the parameters you want to monitor, you then setup your interceptor to actually scan through them automatically.  You are able to pick what it shows, how long it shows it, and what part of the gauge shows the readout.  This keeps your hands on the wheel and also keeps you informed about what your vehicle is doing at all times.  We setup a few different ones just to see how it worked, but the ability to fine tune this is really exciting for somebody who really wants to know exactly what is going on with their car.  Another neat feature which you setup to your specs are the warning lights.  Say for example you are towing a large trailer or driving aggressive at the track.  The interceptor can be setup to alert you when your transmission temperature reaches dangerous levels.  The red LED lights will turn on, letting you know to stop and let everything cool down.  That is an amazing feature which can be programmed to almost any parameter the gauge reads, and whatever level you feel is dangerous or damaging. 

Two additional features that will be used only from time to time on most vehicles also come on the Interceptor.  The famous "Check Engine Lights" can be read directly on the gauge, and also cleared.  For some this will be very useful, but for others you may never have to check those DTCs.  The gauge also includes a performance run type of feature.  Basically, you tell the gauge you want to measure your performance, hit the gas, and it will record 0-60 times and quarter mile times.  From what I have read online, the numbers given are pretty accurate.  I will say this helped us consume quite a bit of fuel on our tester vehicles trying for the best possible times.  Winter tires and salty roads only helped so much though...

Overall, we feel the Aeroforce Interceptor is a win.  If you can get around the fact that you are buying a very expensive gauge, and realize the capabilities it has, you will find this to be your new best friend that rides in the car with you.  The amount of items it will readout, setting up the alerts, fixing check engine lights, and also having some fun with the 0-60 times - the Interceptor is something you will not get sick of.  I have yet to drive with one for an extended amount of time, but in all honesty feel kind of alone without it because I liked knowing what was going on with my car.  This is not a product that you will be able to justify to everyone out there.  The Interceptor is made for people who need more from their car.  If you were on the fence, considering one, or just looking for reassurance from us - go for it.

For more information and to purchase, visit Aeroforce Technology Inc.


Hoagie Positives

  • Parameters! - The Interceptor will read out everything and then some.  Still amazed at how much info is crammed into such a tiny package.
  • Size - Speaking of being tiny, you can install this in so many different places without looking like you are from the first Fast and Furious movie.
  • Everything Else - DTC Readout, Warning Lights, Customized Gauge Faces, and Made in the USA!
  • Company based out of Ohio - Just like Hoagies Garage.

Hoagie Negatives

  • Cost - This is a single gauge that costs over $200.
  • Tinkering - The Interceptor takes some setting up to get perfect.  If you are old school and not tech savvy, this could keep you from enjoying it until you get it all dialed in.
February 03, 2014 /JT
AeroForce, Interceptor, Aftermarket, Product Reviews, Products
Comment

Valentine One

January 06, 2014 by JT

The radar detector, fuzz buster, radar jammer, laser detector, or whatever else you want to call it can be one of the most useful tools on the highway.  One thing I find amazing though, is the fact that they have been around for so many years, and most people think they do not work.  It really does seem gimmicky - something that tells you where the police are.  Most times too, they will also tell you where the garage door openers and security systems are as well.  For this review, we are going to touch on a couple quick facts about detectors themselves, then go into a product review on the Valentine One.

Radar detectors are simply that - a device that detects radar.  They don't jam, block, or confuse our state and local police officers.  Obviously, most people will be buying a radar detector because they exceed the posted speed limit.  Others though, will be buying them like they would buy a police scanner, just to be informed and see what is going on in the world.  No matter what your use, they are a fun toy that can add a little bit of information to your journey.  Most police will run radar to detect your speed- another option is laser.  Depending on what type of system the police use, your detector might or might not detect it.  The model we are looking at in this article does both, it is the very expensive and very well respected Valentine One.  It retails for $399 and has some unique features that many have tried to copy or recreate, but time and time again they are not successful.  We aren't going to look at crazy technical specs, setup radar tests with police officers or anything like that for this story.  This is just an opportunity to tell you about a great product and some of the new add-ons Valentine now offers in their store.

Valentine has a lock on the high end detector market.  Other companies have made decent attempts to recreate, outdo, and just make their products better.  Some new options like GPS enabled alerts, smartphone integration, and even cordless detectors have come to the market.  Valentine seems to have stuck to their bread and butter by keeping their only model up to date and current.  Any Valentine One can be sent in and upgraded for a small fee to the latest software and hardware.  For me, that is a neat feature which you do not find too much anymore.  Most electronics are throwaways which force you to buy an entirely new model.  Valentine will take your old one, upgrade or replace, ship you the new setup, and you are good to go.  With that being said, here are some of the features on our model and also some of the add-ons that we have tested out.

View fullsize P1030212.jpg
View fullsize P1030214.jpg
View fullsize P1030213.jpg

The Valentine One has a unique display.  This display shows a bogey counter and also directional arrows.  These two features are some of the most important.  Telling you how many and where they are coming from is absolutely something that if you use it, you will never want to go back.  I have heard rumors that Valentine has a patent on this type of display, as you will not find any other companies with that type of look.  Either way, it gives you a serious advantage over many other detectors.  The range of a Valentine is something of legend too.  The amount of time you have to slow down or notice the threat is where the range kicks in - basically the further you can pick up a threat, the better off you are.  One issue that has been coming up, is that Valentine has fallen off and not kept up with the times.  Like stated earlier, smartphone integration and GPS is something that everyone seems to want.  Well Valentine has stepped up with a new product called V1 Connection.  This is an add-on for your detector that basically gives it Bluetooth connectivity.  You then download the app to your smart phone and they talk to one another.

The V1 connection is something that gives you another level of control.  With the app, you can control settings, have a larger display, and even monitor GHz of the different threats you pick up.  It really just makes your detector smarter and gives you more information than the actual detector can display.  The Bluetooth unit will run you $49 plus shipping, which isn't crazy expensive, but you have to ask yourself if this is something you want or even need.  For me, I found that app to be just ok - a step in the right direction for valentine, but in all honesty I've never had that desire to look at super detailed radar/laser threat pictures and change my settings on the fly.  If the app could be updated to run in the background, integrate into Trapster, or even be added to a smartphone GPS app then they will have something.  Right now, its just not enough for me to dedicate my entire phone screen to more Valentine information, especially if I have to restart the app each time I click out of it to do anything else.

View fullsize P1030209.jpg
View fullsize P1030210.jpg
View fullsize IMG_6115.PNG
View fullsize IMG_6116.PNG
View fullsize IMG_6117.PNG

The next new product we wanted to try is called SAVVY.  This is another add on for the Valentine One Radar/Laser detector.  The point of this is very simple: It lets your detector automatically mute and not annoy you below certain speeds.  Savvy is a very clever little unit that plugs into your vehicles OBD diagnostic port.  You set the speed threshold on a small knob, then the Savvy does the rest.  Another neat aspect of this little unit is the fact that it powers your Valentine One on and off when you turn your key in the ignition.  No more hard wiring your unit and trying to stealthly install a switch somewhere.  For most vehicles, this will handle all of the power needs and also free up a precious 12v power outlet in your car.  Savvy runs $79 plus shipping, and like all of their products, can only be bought from Valentine themselves.  This is a great product that really enhances and makes your install easy.  I would highly recommend Savvy with your Valentine 1 if you are going to take the plunge.

View fullsize P1030216.jpg
View fullsize P1030219.jpg
View fullsize P1030217.jpg

On a final note, the Valentine One is a premium product.  When the package arrives and you start to use the unit, you really do realize that you have something that you can count on.  Valentine has kept things fairly simple and straight forward.  The biggest hurdle for this product is the price.  If you find yourself putting on the miles each day or taking quite a few trips, it will easily pay for itself over and over.  This is especially true if you are into spirited driving and monitoring the law enforcement you encounter along your route. 

For more ordering information and everything else related, visit: http://www.valentine1.com

Valentine One Radar Detector
$484.95
Buy on Amazon

Hoagie Positives

  • Amazing Range - You really can pick up signals from miles away.
  • Solid Construction - This is a premium product that does not feel cheap.
  • Upgradeable - The Radar/Laser detector can be mailed in for years to come for upgrades and improvements.

Hoagie Negatives

  • Price - $399 just for the detector and no add-ons, very tough to justify.
  • New Tech - The Valentine doesn't seem to be flashy and "current" like other detectors, if that sort of thing bothers you.
  • Living Without It - You really will feel alone when you hop into a car that doesn't have the Valentine.  I wish I had one in every vehicle....


January 06, 2014 /JT
1 Comment
  • Newer
  • Older

Powered by Squarespace